
What does label production look like from A to Z? This is a seemingly simple question, but the answer turns out to be surprisingly complex. Label production is a technological process in which every detail counts: from the information provided by the customer to the choice of the right adhesive or winding direction. That is why it is so important to understand what happens “on the other side” – at the printing plant.
This guide will show you what the entire process looks like – step by step, without shortcuts or simplifications.
1. Label production – from brief to decision
Production doesn’t start in the print shop, it starts in… conversation. The customer makes a request and provides the data:
- What the labels will be used for (e.g., jars, cartons, PET bottles),
- what conditions prevail at the place of application and storage (e.g., moisture, refrigeration, contact with fats),
- how many pieces are needed and how they are to be packaged,
- whether they will be applied manually or by machine.
A good understanding of these issues is the foundation. The wrong adhesive? The wrong material? That’s a straight path to complaints. That’s why in a print shop, a good brief is an absolute must.
2. Label design – aesthetics and technique
The customer can provide his own design or have it printed by a printer. In either case, technical corrections are necessary.
The graphic designer prepares the file according to the machine’s requirements:
- Adds bleed (usually 2 mm on each side),
- sets safety margins,
- converts fonts to curves,
- controls the color scheme (CMYK/Pantone),
- creates a PDF/X production file with die-cut markings.
It is this step that avoids printing and cutting errors – such as offsets, incorrect colors or smudged text.
3. Label production: choice of materials and technology
The next stage is technological decisions. And there are actually quite a few of them:
- Do we print digitally, flexo, or offset?
- Is the material film or paper?
- Will you need a stronger adhesive (e.g., for difficult surfaces)?
- Will the product come into contact with water, grease, or perhaps alcohol?
At this stage, possible enhancements are also selected: laminate, UV varnish, cold foil, and even micro-beading to improve the grip of the product. All this affects not only the appearance, but also the durability of the label.
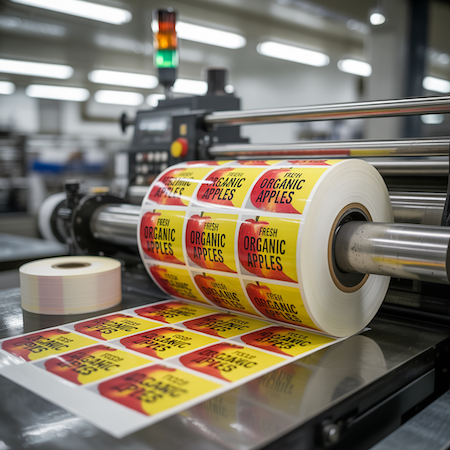
4. Printing – or what happens “on the shop floor”
Once the digital proof or physical sample is approved, the file goes to the machine. Depending on the technology chosen, printing may take a few minutes (digital printing) or require preparation of print forms (flexography).
With large print runs, color stability is very important – color control systems are then used to make each copy look identical.
This is also where the stage of finishing comes in – such as glossy varnish, soft touch foil, or cold gilding.
5. Die cutting, cutting and converting
After printing, it’s time to give the label the right shape. Most commonly, die-cutters – physical molds that cut labels into the desired shape – are used. Laser plotters are also becoming increasingly popular, allowing greater flexibility.
Finished labels go on cores (rolls), and their diameter, winding direction or quantity on the roll must be in accordance with the customer’s requirements – especially if the labels are to be applied by machine.
In addition, for larger runs, inline quality control is used – a camera tracks each item, eliminating copies with a defect.
6. Quality control and logistics
Finally, everything goes to the final inspection. Here it is checked:
- Color conformity with the proof,
- correctness of cutting and gluing,
- durability of printing and consistency of the series.
Packaging is also important – especially if the rolls need to be transported over long distances. Moisture resistance, the right case or logistics labels are all elements that matter to the customer’s production department.
Summary: What does label production look like from A to Z?
The label production process is not just printing. It’s a whole series of decisions and actions – from the choice of material to the direction of roll winding.
Wondering if it’s worth it to outsource the project to a printer right away? If you care about speed, consistency and security – this is definitely a good step.
Looking for a partner to guide you through the entire process? Contact us – the label will be ready faster than you think.